
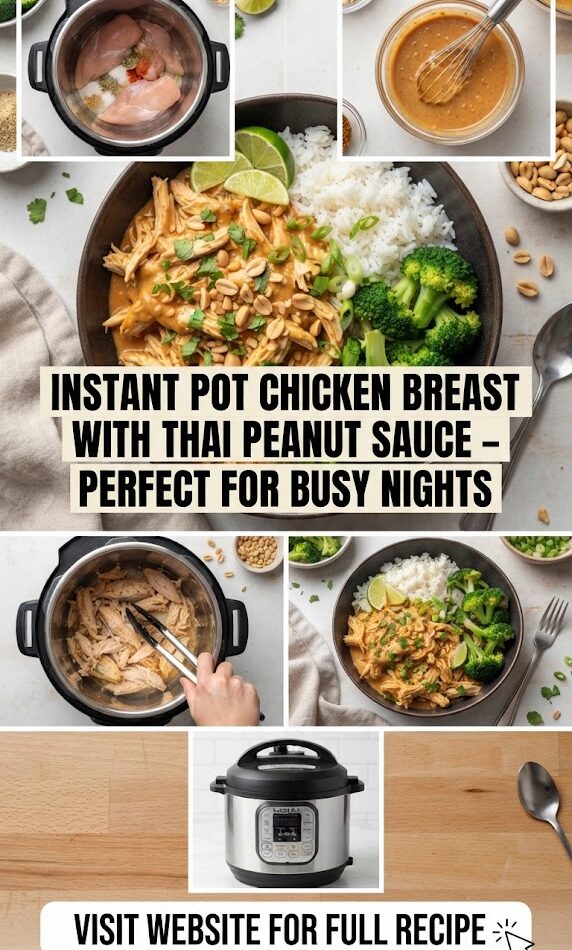
In the modern, fast-paced world, the quest for a dinner that is simultaneously healthy, flavorful, and incredibly fast can often feel like a pipe dream. We’ve all been there: standing in front of the refrigerator at 6:00 PM, staring at a pack of frozen chicken breasts, and feeling the weight of a long workday. This is where the magic of the Instant Pot and the vibrant, bold flavors of Thai cuisine converge to create the ultimate weeknight savior.
Instant Pot Chicken Breast with Thai Peanut Sauce is not just a meal; it is a culinary strategy. It transforms the humble, often-maligned chicken breast into a succulent, flavor-packed masterpiece drenched in a velvety, nutty, and spicy sauce that tastes like it spent hours simmering on a stove in Bangkok. Whether you are meal prepping for the week, feeding a hungry family, or simply trying to avoid the siren call of the takeout menu, this recipe is your new best friend.
Why the Instant Pot is a Game-Changer for Chicken Breast
For decades, the chicken breast has had a reputation for being dry, rubbery, and bland. Because it is so lean, it overcooks in a heartbeat on the grill or in the oven. However, the Instant Pot changes the physics of cooking meat. By using high-pressure steam, the Instant Pot forces moisture into the fibers of the chicken, ensuring that every bite is tender and juicy.
Moreover, the “set it and forget it” nature of the pressure cooker means you aren’t tethered to the stove. While the chicken cooks, you can decompress, help the kids with homework, or whip up a quick side dish. The efficiency of the Instant Pot makes it possible to achieve deep, slow-cooked flavor profiles in a fraction of the time.
The Soul of the Dish: Decoding Thai Peanut Sauce
To understand why this dish is so addictive, we have to look at the Thai flavor profile. Thai cooking is celebrated for its mastery of balance. It harmonizes four essential elements:
- Salty: Provided by soy sauce or fish sauce.
- Sweet: Usually from brown sugar, honey, or maple syrup.
- Sour: Delivered through fresh lime juice or rice vinegar.
- Spicy: Introduced via red curry paste, Sriracha, or fresh chili peppers.
The peanut sauce (often referred to as Satay sauce in a different context) acts as the bridge between these flavors. The fat from the peanut butter carries the heat of the spices and the tang of the acid, coating the palate in a way that makes you crave another bite immediately.
The Ultimate Ingredient Breakdown
To make a truly spectacular Thai Peanut Chicken, you need high-quality ingredients. While this recipe is pantry-friendly, understanding the role of each component will help you customize the dish to your liking.
1. The Chicken
Boneless, skinless chicken breasts are the standard choice here. Because we are pressure cooking them in a rich liquid, they won’t dry out. However, if you prefer a richer flavor, you can easily substitute chicken thighs. Thighs contain more connective tissue and fat, making them even more forgiving under pressure.
2. The Creamy Base: Peanut Butter
For the best texture, use a creamy, high-quality peanut butter. While “natural” peanut butters (the kind you have to stir) provide an authentic roasted flavor, some can be a bit gritty. A standard creamy peanut butter results in the smoothest sauce. If you have a peanut allergy, almond butter or sunflower seed butter (SunButter) works surprisingly well as a substitute.
3. The Liquid Gold: Coconut Milk
Do not reach for the light coconut milk if you want a restaurant-quality experience. Full-fat canned coconut milk provides the necessary lipids to emulsify the sauce. It creates a luscious, thick consistency that clings to the chicken.
4. The Aromatics: Ginger and Garlic
Fresh is non-negotiable here. Freshly grated ginger provides a zesty, peppery bite that dried ginger simply cannot replicate. Garlic adds depth and that essential savory undertone. If you’re in a rush, the jarred minced versions are acceptable, but fresh will always win on flavor.
5. The Flavor Boosters: Red Curry Paste and Soy Sauce
Thai red curry paste is a concentrated explosion of lemongrass, galangal, shrimp paste (usually), and chilies. A little goes a long way. For the salt component, soy sauce provides umami. If you are gluten-free, substitute with Tamari or liquid aminos.
Step-by-Step Instructions for Success
Success in the Instant Pot is all about the order of operations. Follow these steps to avoid the dreaded “Burn” notice and to ensure your chicken is cooked to perfection.
Step 1: The Sauté Phase
Turn your Instant Pot to the “Sauté” function. Add a splash of oil (sesame or coconut oil works best). Once hot, add your aromatics—the garlic and ginger. Sauté for just 30 to 60 seconds until fragrant. If you like a bit of texture, you can also add sliced red bell peppers or onions at this stage.
Step 2: Deglazing
This is the most important step for preventing the “Burn” warning. If any bits of garlic or ginger are stuck to the bottom of the pot, pour in a tablespoon of water or broth and scrape the bottom with a wooden spoon. The bottom must be smooth before proceeding.
Step 3: Layering the Ingredients
Turn off the Sauté function. Pour in half of your coconut milk. Place the chicken breasts on top of the liquid in a single layer. In a separate bowl, whisk together the remaining coconut milk, peanut butter, soy sauce, lime juice, honey, and red curry paste. Pour this mixture over the chicken. Do not stir. Leaving the thick sauce on top prevents it from scorching on the bottom of the pot.
Step 4: Pressure Cooking
Lock the lid and set the valve to the “Sealing” position. Set the Instant Pot to Manual/Pressure Cook on High for 8 to 10 minutes (depending on the thickness of the breasts).
Step 5: The Release
Once the timer goes off, let the pressure release naturally for 5 to 10 minutes. This “Natural Pressure Release” (NPR) is crucial for meat; a quick release can cause the muscle fibers to contract suddenly, resulting in tough chicken. After the NPR, move the valve to “Venting” to release any remaining steam.
Step 6: Finishing the Sauce
Remove the chicken to a plate. If the sauce looks too thin, turn the Sauté function back on and let it simmer for 3 to 5 minutes to reduce. Alternatively, you can stir in a cornstarch slurry (1 tbsp cornstarch mixed with 1 tbsp water). Slice or shred the chicken and return it to the pot to coat it in the thickened sauce.
Expert Tips for the Best Thai Peanut Chicken
- Frozen Chicken: Yes, you can cook frozen chicken breasts! Just increase the manual cook time to 12–15 minutes. Ensure the breasts are separated; if they are frozen in a solid block, the center won’t cook through.
- The “Burn” Notice: If you frequently get “Burn” errors, it’s usually because the sauce is too thick. Add an extra 1/4 cup of chicken broth to the bottom of the pot before adding the chicken to ensure there is enough thin liquid to create steam.
- Balance the Heat: If you are sensitive to spice, start with only 1 tablespoon of red curry paste. If you love heat, add a teaspoon of sambal oelek or extra Sriracha at the end.
- Nutrient Boost: Stir in a few handfuls of fresh baby spinach or kale right after you finish cooking. The residual heat will wilt the greens perfectly, adding color and nutrients to your meal.
Serving Suggestions: How to Build Your Bowl
This dish is incredibly versatile when it comes to serving. Here are four ways to enjoy it:
- The Classic: Serve over a bed of fluffy Jasmine rice. The rice acts as a sponge, soaking up every drop of that glorious peanut sauce.
- Low-Carb/Keto: Serve over cauliflower rice or “zoodles” (zucchini noodles). The richness of the peanut sauce makes you forget you’re eating a mountain of vegetables.
- The Noodle Bowl: Toss the chicken and sauce with cooked rice noodles or even linguine for a Thai-inspired pasta dish.
- The Crunch Factor: No matter how you serve it, toppings are essential. Garnish with crushed roasted peanuts, fresh cilantro, sliced green onions, and a heavy squeeze of lime juice.
Meal Prep and Storage
This recipe is a meal-prepper’s dream. In fact, many people argue that it tastes even better the next day as the flavors have more time to meld together.
- Refrigerator: Store in an airtight container for up to 4 days.
- Reheating: Reheat gently in the microwave or on the stovetop. If the sauce has thickened too much in the fridge (which it will, due to the peanut butter and coconut milk fats), simply add a splash of water or coconut milk to loosen it up.
- Freezer: You can freeze the cooked chicken in the sauce for up to 3 months. Thaw overnight in the refrigerator before reheating.
Nutritional Benefits of This Recipe
Beyond being delicious, this Instant Pot Chicken with Thai Peanut Sauce is packed with nutritional value:
- High Protein: Chicken breast is one of the leanest sources of high-quality protein, essential for muscle repair and satiety.
- Healthy Fats: Peanut butter and coconut milk provide monounsaturated and medium-chain triglycerides (MCTs), which can provide a steady source of energy.
- Anti-Inflammatory Properties: Fresh ginger and garlic are powerhouses of antioxidants and have been used for centuries to support the immune system and reduce inflammation.
- Low Sugar: By making your own sauce at home, you avoid the excessive refined sugars found in bottled Thai sauces.
Customizing for Dietary Restrictions
One of the reasons this recipe is a household staple is how easily it adapts to different dietary needs:
- Vegan/Vegetarian: Swap the chicken for extra-firm tofu (pressed and cubed) or chickpeas. Use a “no-fish” sauce or extra soy sauce, and ensure your red curry paste doesn’t contain shrimp paste.
- Gluten-Free: Use Tamari or Coconut Aminos instead of soy sauce.
- Paleo: Use almond butter instead of peanut butter and coconut aminos instead of soy sauce. Ensure your curry paste has no added sugar.
Troubleshooting Common Issues
“The sauce is too salty!”
This can happen if your peanut butter or chicken broth has a high sodium content. To fix it, add a squeeze more lime juice (acid cuts salt) or a teaspoon of honey (sweetness balances salt).
“The chicken is tough.”
This is almost always a result of doing a “Quick Release” instead of a “Natural Release.” Next time, give the meat at least 5 to 10 minutes to rest under pressure.
“The sauce separated.”
If the coconut milk and peanut butter look “broken” or oily, don’t panic. Give it a vigorous whisk. Sometimes adding a teaspoon of warm water while whisking can help re-emulsify the fats.
The Recipe: Instant Pot Thai Peanut Chicken
Prep time: 10 minutes | Cook time: 10 minutes | Total time: 30 minutes | Servings: 4
Ingredients
- Chicken: 1.5 lbs boneless, skinless chicken breasts (approx. 3 large breasts).
- Peanut Butter: 1/2 cup creamy peanut butter.
- Coconut Milk: 1 can (13.5 oz) full-fat coconut milk.
- Soy Sauce: 3 tablespoons (or Tamari for gluten-free).
- Honey: 2 tablespoons (or maple syrup).
- Red Curry Paste: 1–2 tablespoons (depending on spice preference).
- Lime Juice: 2 tablespoons fresh lime juice.
- Rice Vinegar: 1 tablespoon.
- Aromatics: 1 tablespoon freshly grated ginger, 3 cloves minced garlic.
- Oil: 1 tablespoon coconut or sesame oil.
- Garnish: Fresh cilantro, crushed peanuts, green onions, lime wedges.
Instructions
- Sauté: Press the Sauté button on your Instant Pot. Add the oil, ginger, and garlic. Cook for 1 minute until fragrant.
- Deglaze: Add 2 tablespoons of the coconut milk to the pot and scrape any browned bits off the bottom. Cancel the Sauté function.
- Layer: Place the chicken breasts in the pot.
- Mix Sauce: In a medium bowl, whisk together the rest of the coconut milk, peanut butter, soy sauce, honey, red curry paste, lime juice, and rice vinegar.
- Pour: Pour the sauce over the chicken. Do not stir.
- Cook: Seal the lid. Set to Manual/High Pressure for 8 minutes (10 minutes if the breasts are very large).
- Release: Allow a 5-minute Natural Pressure Release, then flip the valve to Venting.
- Finish: Remove chicken and slice or shred. If the sauce is too thin, simmer on Sauté for a few minutes. Toss the chicken back into the sauce.
- Serve: Serve over rice or noodles and top with garnishes.
Why You Should Make This Tonight
The beauty of the Instant Pot Chicken Breast with Thai Peanut Sauce lies in its complexity of flavor relative to its simplicity of preparation. In the time it takes for a pizza to be delivered, you could be sitting down to a bowl of vibrant, aromatic, and deeply satisfying Thai food.
This recipe encourages you to play with your food—add more spice if you’re feeling bold, more lime if you want it bright, or more peanuts for that satisfying crunch. It is a forgiving, flexible, and fundamentally delicious way to handle the “what’s for dinner?” dilemma.
In an era where we are constantly bombarded with decisions, let dinner be the easy part. Harness the power of your pressure cooker, embrace the bold flavors of the East, and transform your kitchen into a Thai bistro for the night. Your taste buds—and your schedule—will thank you.
Frequently Asked Questions (FAQs)
Can I use peanut flour or PB2?
While you can, the texture will not be nearly as creamy. Peanut flour lacks the natural oils found in peanut butter that contribute to the mouthfeel of the sauce. If you use PB2, you may need to add a bit more coconut milk or a teaspoon of oil.
Is this recipe spicy?
As written, it has a “medium” heat profile. Most of the heat comes from the red curry paste. If you are cooking for children or those who dislike heat, use only 1/2 tablespoon of curry paste or look for a “mild” brand.
Can I add vegetables to the pot?
Yes! Harder vegetables like carrots or sliced onions can be added at the beginning. Softer vegetables like bell peppers or snap peas are best added after the pressure cooking is done; simply stir them into the hot sauce and let them sit for 3 minutes until tender-crisp.
What if I don’t have an Instant Pot?
You can make this in a slow cooker (Low for 4-6 hours) or on the stovetop. For the stovetop, simmer the chicken in the sauce in a covered skillet for about 15-20 minutes until the internal temperature reaches 165°F.
How do I store leftovers?
Leftovers are perfect for lunches! Store in glass containers to prevent the turmeric in the curry paste from staining plastic. The sauce will thicken significantly when cold, so a quick splash of water before microwaving is recommended.
Can I use different nut butters?
Absolutely. Cashew butter creates an incredibly rich and slightly sweeter version of this dish. SunButter is an excellent nut-free alternative that mimics the earthy flavor of peanuts quite well.
Final Thoughts: The Joy of Easy Cooking
Cooking doesn’t have to be a chore, and healthy food doesn’t have to be boring. This Instant Pot Thai Peanut Chicken is a testament to the fact that with the right tools and a few bold ingredients, you can create a meal that is both nourishing and indulgent. It’s a recipe that invites you to experiment and find your perfect balance of flavors.
So, the next time you find yourself reaching for the phone to order takeout, remember that a better, healthier, and more delicious meal is just 30 minutes away in your Instant Pot. Grab that jar of peanut butter, find your curry paste, and get cooking!